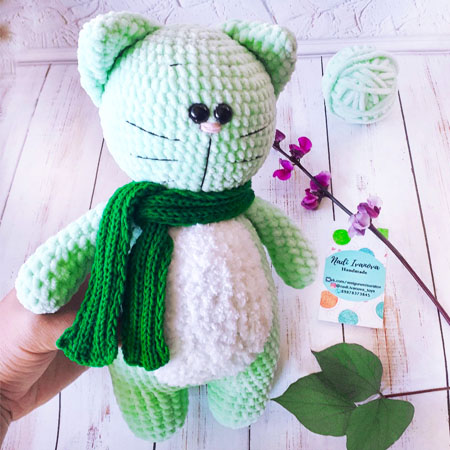
It’s a good day to make a plush cat amigurumi, isn’t it? This toy cat amigurumi pattern, which you can make quite easily, is completely free. You can make this amigurumi toy with a different color according to your own choice, which is made by choosing a light green color. I think it will not take much of your time because it is made with velvet yarn. Now if you’re ready, let’s get started.
Designer: nadi.ivanova_toys
Materials
– 1 skein of plush yarn (Himalaya Dolphin Baby 100g / 120 m), 1 skein was enough for me, but it’s better to have a a margin of another 10-15 meters.
– Alize Softy half hank, for belly
– hook number 4
– eyes 12 mm
– filler
– black and pink floss threads (for spout and antennae)
– white sewing threads (for sewing details)
– sewing needle
– yarn for clothes
Abbreviations
sc : Single Crochet
inc : Increase
dec : Decrease
st: Stitch
hdc: Half Double Crochet
sl-st : Slip Stitch
ch : Chain
..in : make increase into same stitch as many as the number which is given in front of “inc” abbreviation (exp; 3inc, 4inc..).
FLO : Crochet into front loops only
BLO : Crochet into back loops only
Head
1 Rnd: 6 sc in MR
2 Rnd: 6 inc (12)
3 Rnd: (1 sc, inc)*6 (18)
4 Rnd: (2 sc, inc)*6 (24)
5 Rnd: (3 sc, inc)*6 (30)
6 Rnd: (4 sc, inc)*6 (36)
7 Rnd: (5 sc,inc)*6 (42)
8 Rnd: (6 sc, inc)*6 (48)
9 Rnd: (7 sc, inc)*6 (54)
10-15 Rnd: 54 sc (6 rnds)
Between 11-12 rows insert eyes between them 1-2 sc.
16 Rnd: (7 sc, dec)*6 (48)
17 Rnd: (6 sc, dec)* 6 (42)
18 Rnd: (5 sc, dec)*6 (36)
19 Rnd: (4 sc, dec)*6(30)
20 Rnd: (3 sc, dec)*6 (24)
21 Rnd: (4 sc, dec)*4 (20)
Fasten the thread and cut.
We stuff the head as we crochet.

Ears
1 Rnd: 6 sc in MR
2 ряд.( 1 sc, inc)*3 (9)
3 Rnd: (2 sc, inc)*3 (12)
4 Rnd: (3 sc, inc)*3 (15)
5 Rnd: (4 sc, inc)*3 (18)
6 Rnd: 18 sc (18)
Fold the part in half and crochet 8 sc for both walls. Fasten the thread and cut.
Similarly, we crochet the second ear.

Arms
1 Rnd: 6 sc in MR
2 Rnd: 6 inc (12)
3-5 Rnd: 12 sc (3 rnds)
6 Rnd: (2 sc, dec)*3 (9)
7-13 Rnd: 9 sc (7 rnds)
We stuff the handle as we crochet. Bigger at the bottom, smaller towards the shoulder.
Fold the part in half and crochet 4 sc for both edges. Fasten the thread and cut. We crochet the second handle in the same way.

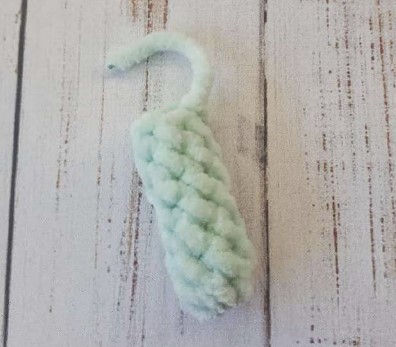
Tail
1 Rnd: 6 sc in MR
2-7 Rnd: 6 sc (6 rnds)
Fasten the thread and cut.
Do not stuff the tail. We will then tie it into the body.
legs
1 Rnd: 6 sc in MR
2 Rnd: 6 inc (12)
3 Rnd: (1 sc, inc)*6 (18)
4-7 Rnd: 18 sc (4 rnds)
Fasten the thread and cut.
Similarly, we crochet the second leg, but we do not cut the thread, but we make the slst and 4 ch, we attach the second leg with the help of the slst. We put a marker at the beginning of the row.

Body
8 Rnd: 18 sc (on the left leg), 4 sc in chain, 18 sc (on the right leg), 4 sc in chain (44)
The marker goes on the back.
We fill tightly with HOLLOFIBER.
9 Rnd: 44 sc 10 Rnd: inc, 8 sc, inc, 7 sc, 6 inc, 7 sc, inc, 8 sc, inc, 4 sc (54)
ATTENTION! You may have other values. Increases are located behind the chain between the ch, on the sides and tummy.
11 Rnd: 54 sc

In the next row we will crochet a tail. The tail is located exactly between the legs. Focus on your crocheting. Make bias loops if needed.
12 Rnd: 51 sc, 3 sc along with the tail (54)
13-18 Rnd: 54 sc (6 rnds)
19 Rnd: (7 sc, dec)*6 (48)
20 Rnd: 48 sc
Do not forget to fill with holofiber.
21 Rnd: (6 sc, dec)*6 (42)
22 Rnd: 42 sc
23 Rnd: (5 sc, dec)*6 (36)
24 Rnd: 36 sc
25 Rnd: (4 sc, dec)*6 (30)
26 Rnd: 30 sc
27 Rnd: (3 sc, dec)*6 (24)

In the next row we will crochet handles. The handles are symmetrical.

28 Rnd: 5 sc, 4 sc along with a arm, 8 sc , 4 sc along with a arm, 3 sc. (24)
29 Rnd: (4 sc, dec)*4 (20)

Fasten the thread and cut.
WE FILL TIGHTLY WITH HOLOFIBER.

Tummy
We crochet with Alize Softy yarn in one thread, hook number 2.
We make
15 ВП.
1 Rnd: In the second from the hook we make sc, 12 sc, in the last loop of the row we make 3 sc, 12 sc on the other side, inc in the last loop. We put a marker, here will be the beginning of the row. (30)
2 Rnd: inc, 12 sc, 3 inc, 12 sc, 2 inc (36)
3 Rnd: (1 sc, inc), 12 sc, (1 sc, inc)*3, 12 sc, (1 sc,inc)*2 (42)
4 Rnd: (2 sc, inc), 12 sc, (2 sc, inc)*3, 12 sc, (2 sc,inc)*2 (48)
5 Rnd: (3 sc, inc), 12 sc, (3 sc, inc)*3, 12 sc, (3 sc,inc)*2 (54)
6 Rnd: (4 sc, inc), 12 sc, (4 sc, inc)*3, 12 sc, (4 sc,inc)*2 (60)
7 Rnd: (5 sc, inc), 12 sc, (5 sc, inc)*3, 12 sc, (5 sc,inc)*2 (66)
Fasten the thread, leave a long end for sewing. But you can sew on with sewing thread.

Be sure to sample! If it seems to you that the belly is small / large, you can crochet / shorten a few rows.

We apply the TUZIKO in the center of the tummy. Pre-fix with needles. We sew.
We make out the nose under the eyes at a distance of 1-2 sc.

We embroider the antennae with threads, I have them 7 sc in length.
Eyebrows are arranged symmetrically to each other.
We do it at our discretion.

We sew on the ears and head, stuff the neck area very tightly with holofiber.