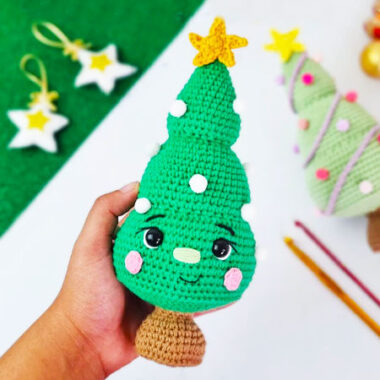
Get into the holiday spirit with this Crochet Christmas Pine Tree pattern! Whether you’re decorating for the season or crafting festive gifts, this detailed and stylish crochet tree will be the perfect addition to your home. Plus, you can easily customize it to create different versions of the classic Christmas pine tree.
Key Features of the Crochet Christmas Pine Tree:
- Layered, Detailed Design: This Christmas pine tree has a layered structure, making it a beautiful and eye-catching decoration. The simple yet effective filling method ensures a perfect shape every time. Clear instructions in the pattern guide you through each step for a seamless crafting experience.
- Festive Star Topper: No Christmas tree is complete without a star! The pattern includes detailed instructions for adding a golden yellow star to the top of your tree, making it a standout piece of your holiday decor.
- Customizable Versions: Feel free to experiment and make your own variations of the crochet Christmas pine tree. You can adjust the size, colors, and even add more decorative elements to personalize your creation.
Why You’ll Love This Pattern:
This Crochet Christmas Pine Tree pattern is perfect for both beginners and experienced crocheters. With simple steps, detailed instructions, and a touch of creativity, you can make a beautiful holiday decoration or gift that will bring joy all season long.
Designer: atelietresbonecas
Download the free PDF pattern and get started on your own festive crochet pine tree today!
Materials
• Soft Amigurumi Yarn 2.5mm Needle
• 11mm Eyes
• Tapestry Needle
• Pins
• Stitch Marker
• Mini Pom Poms
• Craft Glue
Abbreviations
• ch = chain stitch
• sc = single crochet
• BPsc = back post single crochet
• inc = increase
• dec = decrease
• FLO = only in the front loop
• R = rows

Work in a spiral
Tree
1– 6 sc in magic ring (6)
2– [1 sc, 1 inc] 3x (9)
3– sc in each round (9)
4– [2 sc, 1 inc] 3x (12)
5– [3 sc, 1 inc] 3x (15)
6– sc in each round (15)
7– [4 sc, 1 inc] 3x (18)
8– [5 sc, 1 inc] 3x (21)
9– sc in each round (21)
10– [6 sc, 1 inc] 3x (24)
11– sc in each round (24)
12– [2 sc, 1 inc] 6x (30)
13-15– sc in each round (30) 3 rows
16– [2 sc, 1 dec] 6x (24)
17– [1 sc, 1 dec] 6x (18)
18– FLO inc in each round (32)
19– sc in each round (32)
20– [3 sc, 1 inc] 8x (40)
21 to 25– sc in each round (40) 5 rows
Stuff only the first end
26– [4 sc, 1 inc] 8x (48)
27 and 28– sc in each round (48)
29– [1 sc, 1 dec] 16x (32)
30– FLO inc in each round (64)
31 to 40– sc in each round (64) 9 row
Place the eyes (if desired) between rows 33 and 34 with 12 stitches between them
41– BPsc in each round (64)
42– [11 sc, 1 dec] 4x, 12 sc (60)
43– [2 sc, 1 dec] 15x (45)
44– [1 sc, 1 dec] 15x (30)
45– [3 sc, 1 dec] 6x (24)
46– [2 sc, 1 dec] 6x (18)
47– [1 sc, 1 dec] 6x (12)
Switch to brown yarn
48-50– sc in each round (12) 3 rows
Add more stuffing
51– [1 sc, 1 inc] 6x (18)
52– [2 sc, 1 inc] 6x (24)
53– sc in each round (24)
54– [3 sc, 1 inc] 6x (30)
55– [4 sc, 1 inc] 6x (36)
56– sc in each round (36)
57– BPsc in each round (36)
58– [1 sc, 1 dec] 12x (24)
59– dec in each round (12)
Fasten off leaving a long tail.
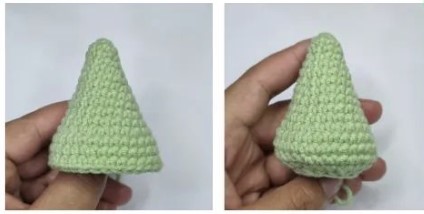
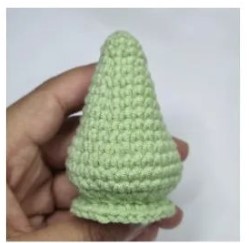
Follow the images on the next page for better guidance
Make a hole with your finger in the middle of the stuffing and insert a piece of a thin hot glue stick, just to give it more support.
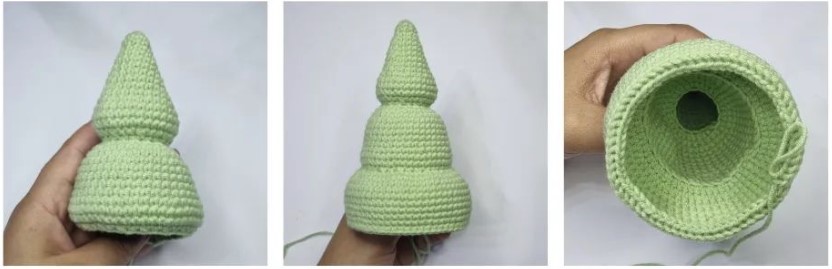
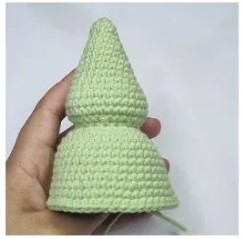
Now start closing it with an inverted magic ring, pull just a little as shown in the image, and before pulling it to close it definitively, put stuffing in the brown part.

Don’t put too much, or your tree won’t stand up on its own.
Finish closing the ring and tie a knot and with the long thread that is left, pass it to the top of the tree with the help of a long needle.
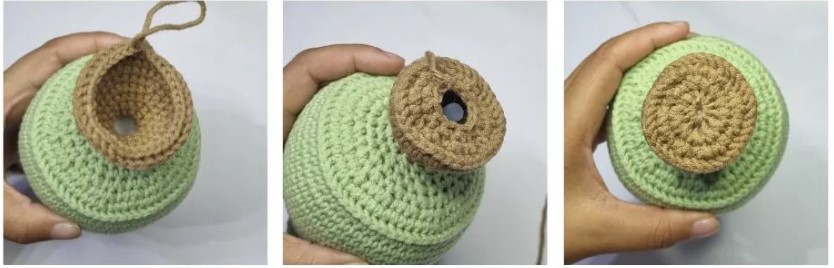
Tie a knot at the top and hide the thread inside the tree, this is just to make the base straighter and so the tree can stand up.
Star and finishing touches
For the star, make:
1-5 sc in the magic ring (5)
Change up 4 ch, return with 1 sl st, 1 sc, 1 hdc, secure with sl st in the next base stitch of the center.
Repeat this pattern until you have 5 points.
Change 150 ch and glue around the tree (optional)

Embroider the rest of the details of the face if you made it with eyes.
For the two circles of the cheeks, make 6 sc in the magic ring, fasten off and glue.


