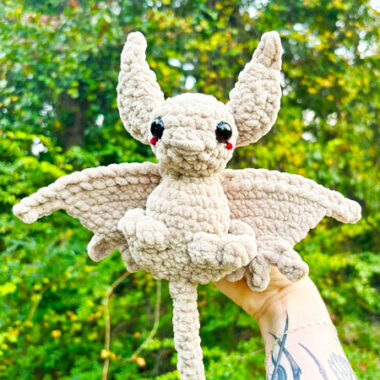
Looking for a fun and spooky Halloween project? This Plush Bat Fidget Amigurumi pattern is a great choice! With its big ears and long tail, this unique bat design is perfect for the Halloween season. The bat features regular-sized wings, adding to its charm while still capturing that eerie Halloween vibe.
Crochet Plush Bat Fidget Toy
Though bats typically don’t have such long tails, this design adds a fun twist, making it even more whimsical. If you like, you can add wire to the wings and tail for extra stability and shape, but it’s not essential. The wings can also be made using a slightly stiffer yarn, or you can choose to use the same yarn throughout for a soft, cuddly texture.
Ready to start crocheting your own Plush Bat Fidget for Halloween? Let’s get crafting!
Designer: laurenhollins_
Notes
Sc = single crochet
Hdc = half double crochet
Inc = sc increase (2 sc in same st) slst slip stitch
Fo = fasten off
St = Stitch
Bbl = bobble stitch (3 x bobble)
Details
I used premier parfait chunky with a 4.5 mm hooks.
This pattern is written in english using us terminology.
Important: you may not copy or replicate any part of this pattern. You can sell your creations, be sure to tag me! @laurenhollins_
Head to body
1. 6sc in mr (6)
2. [inc] X 6 (12)
3. [1 sc, inc] X 6 (18)
4-5. Sc around (2 rounds) (18)
6-7.7 sc, 4 hdc, 7 sc (18)
Add safety eyes between rounds 5 & 6.
Stuff the head.
8. [1 sc, dec] X 6 (12)
9. [dec] X 6 (6)
10. [inc] X 6 (12)
11. Sc around (1 round) (12)
12. [1sc, inc] X 6 (18)
13-16. Sc around (4 rounds) (18)
17. [1 sc, dec] X 6 (12)
18. Sc around (1 round) (12)
19. [dec] X 6 (6)
20. Sc around (1 round) (6)
21. [1 sc, dec] X 2 (4)
We will now carry on to the tail.
Make the tail shorter or longer by adding or taking away rounds.
22-41. Sc around (20 rounds) (4) (80 sts in total)
Fo and close the end of the tail.
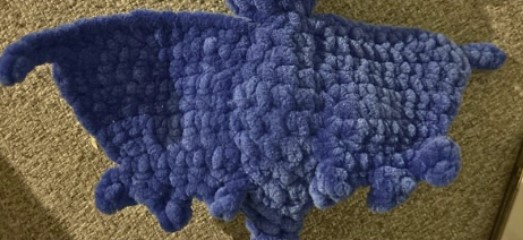
Wings x 2
Ch 15 and starting from the 2nd ch from hook:
1. Slst 4, hdc 10, ch 1, turn (14)
2. Sc 10 (not a complete row) ch 1, turn (10)
3. Dec, sc 8, ch 1, turn (9)
4. Sc 9, ch 1, turn (9)
5. Dec, sc 7, ch1, turn (8)
6. Sc 8, ch 1, turn (8)
7. [dec] X 2, sc 4, ch 1, turn (6)
8. Skip first st then:
Slst into the next,
ch 3, 2nd ch from hook, slst, dc
sc 2 along the row then:
ch 3, 2nd ch from hook, slst, dc
sc 2 along the row then:
ch 3, 2nd ch from hook, slst, dc and slst into the same st.
Fo and leave a long tail to sew to the back
Feet x 2
1.6 sc in mr (6)
2. [inc] X 3 (not a complete round) ch 1, turn
We will now work only in the inc’s in rows.
3 – 4. Sc 6, ch 1, turn ( 2 rounds) (6)
5. Bbl, sc, bbl, bbl, sc, bbl (6)
Slst into the same st.
Fo and leave a tail for sewing

Ears x 2
1. 6 sc in mr (6)
2. [inc] X 6 (12)
3. [1 sc, inc] X6 (18)
Fold in half and sc 8 into both sides.
Ch 4, 2nd ch from hook, slst, sc 2.
Sc into the final stitch of the ear.
Fo and leave a tail for sewing.
Bring the tail down to the bottom of the ear ready to sew to the head.
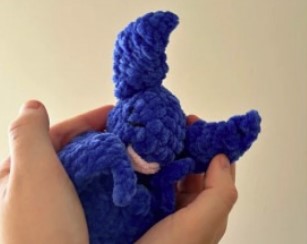
Assembly
The ears will be sewn to the top of the head between rounds 4 and 5.
The wings will be sewn onto the back level with the ears.
The feet will be sewn on between round 15 and 21


