Hello, my dear friends! As Christmas approaches, I’m excited to share wonderful Christmas amigurumi patterns with you. Today, I have a super cute bunny pattern that’s perfect for adding a festive touch to your decorations. This adorable bunny amigurumi is ideal for hanging on the Christmas tree or placing by the fireplace. Best of all, it’s easy to make and a perfect project for all skill levels. Ready to get started? Download the PDF pattern now!
Tree Ornament Bunny Amigurumi Pattern
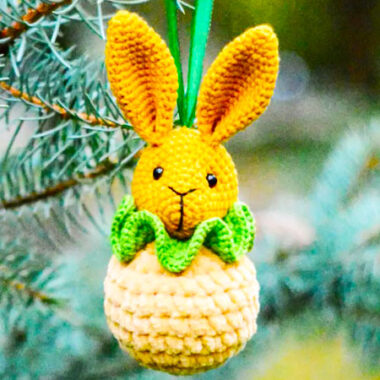
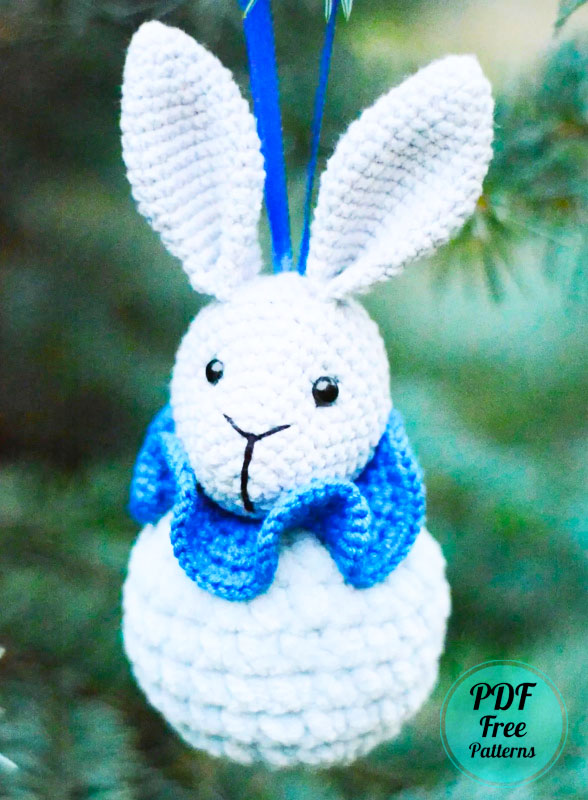
I’m thrilled to share this creative design for decorating your Christmas tree! The bunny’s body is shaped like a pine cone, adding a unique twist to the traditional ornament. This charming combination creates a magnificent and whimsical decoration for the holiday season.
Designer: Vitrinatoys
When publishing your work made from my pattern in social networks you must provide a link to the designer ©vitrinatoys Size of the toy is 15 cm when crocheting from the specified materials.
Materials
1) Yarn <Narnart Jeans», «Yarnart Dolce»
2) Crochet hook size 2 mm, 5 mm
3) Polyester fiberfill
4) Eyes size 6 mm
5) Black cotton thread for nose embroidery
6) Needles for sewing parts
7) Scissors
8) Satin ribbon 6 mm wide
Abbreviations
MR – magic ring
sc – single crochet
hdc – half double crochet
inc – increase
dec – decrease
(6) – the number of stitches in a round/row
*5 – the number of repetitions
ch – chain
Ball
1) 6 sc in MR
2) 6 inc (12)
3) (1 sc + inc) *6 (18)
4) (2 sc + inc) *6 (24)
5-8) 24 sc
9) (2 sc + dec) *6 (18)
10) (1 sc + dec) *6 (12)
11) 6 dec
Cut off the thread, tighten the opening.
Ears (make 2)
1) 4 sc in MR
2) 4 inc (8)
3) 8 sc
4) (1 sc + inc) *4 (12)
5) 12 sc
6) (2 sc + inc) *4 (16)
7) 16 sc
8) (3 sc + inc) *4 (20)
9-12) 20 sc
13) (8 sc + dec) *2 (18)
14) 18 sc
15) (7 sc + dec) *2 (16)
16-17) 16 sc
Fold the ear in half and work 8 sc through both edges.
Sew on the ears to the head folding them in half again.
Head
1) 6 sc in MR
2) 6 inc (12)
3) (1 sc + inc) *6 (18) 4-5) 18 sc
6) (2 sc + inc) *6 (24)
7) 24 sc
8) (3 sc + inc) *6 (30)
9) 30 sc
10) (4 sc + inc) *6 (36)
11-14) 36 sc
Insert the eyes between 8th and 9th rounds. A distance between the eyes is 7 sc. Stuff the head.
15) (4 sc + dec) *6 (30)
16) (3 sc + dec) *6 (24)
17) (2 sc + dec) *6 (18)
18) (1 sc + dec) *6 (12)
19) 6 dec
Cut off the thread, tighten the opening.
Muzzle tightening
Make the tightening for the right eye, then for the left eye. Embroider a nose. Sew on the head to the ball.
Collar
1) 28 ch + 2 ch
2) (1 hdc + inc) *14 + 2 ch (42)
3) (1 hdc + inc) *21 + 1 ch (63)
4) 63 inc from sc (126)
Sew the collar to the ball around the head. Attach a satin ribbon.
The toy is ready!


