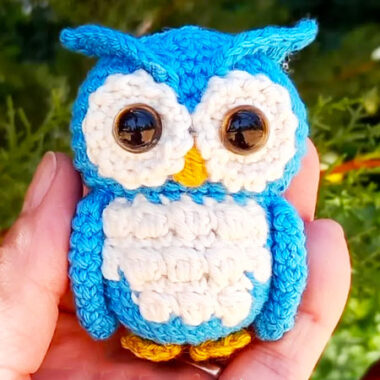
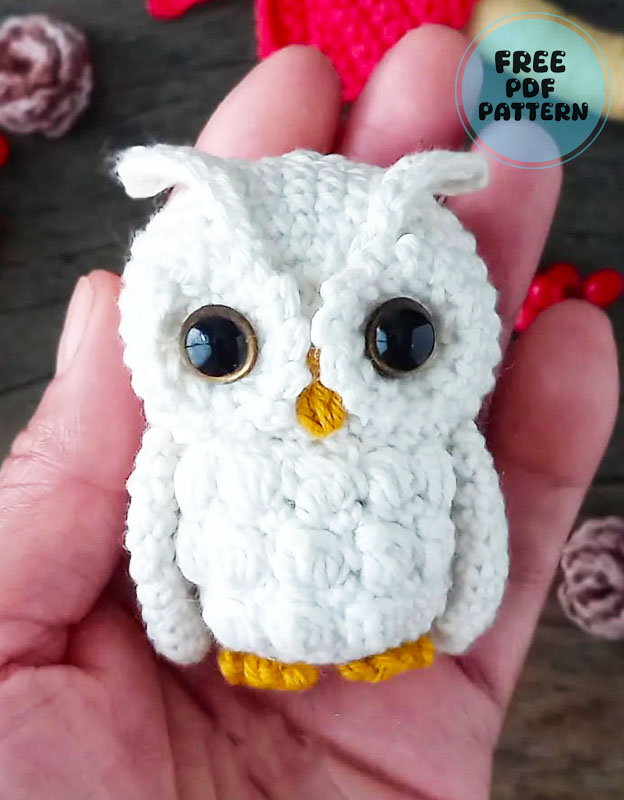
This adorable Owl Hedwig amigurumi may be a 2023 design, but it boasts fresh and unique features that set it apart. The small size of the crocheted owl highlights its intricate details, especially the beautifully crafted eyes. Additionally, the chest area of the toy is designed with the textured bobble stitch, adding extra charm and sophistication.
Owl Hedwig Amigurumi Toy Pattern
To create this cute owl, cotton yarn is recommended for the best results. You can see examples in blue and white, but feel free to get creative and use your favorite colors for a personalized touch. Ready to get started? Let’s make this adorable owl amigurumi together, step by step!
Designer: franlanitas
Free PDF Pattern available for download
Materials
– Cotton thread in winter white and mustard colors
– Crochet hook N° 2.00 mm.
– Stitch markers, tapestry needle
– Scissors, pins
– Stuffing
– Safety eyes No. 8 (ideal with color)
– glue, textile pencil (optional)
Stitches and Abbreviations
mr – magic ring
ch – chain
SC – single crochet
slst – slip stitch
hdc – half double crochet
tr – treble crochet
dc – double crochet
dec – decrease
inc – increase
st – stitch
boble stitch – 4dc in the same stitch and closed together.
Development of the piece and recommendations
Difficulty level: Basic/Intermediate. The body of the owl is worked in circle, remember that when you work in circle, you have to join each round with one slip stitch and then chain 1, in the same stitch start the single crochet stitches of the round. The head, eyes and wings are worked in a spiral.
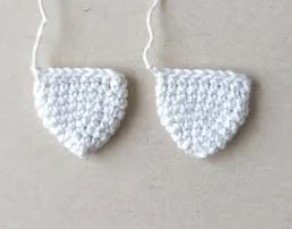
Bird wings
Make 2 in winter white:
Rnd1. 6sc inside mr (6)
Rnd2. (1inc, 2sc) repeat 2 times (8)
Rnd3. (1sc, linc) repeat 4 times (12)
Rnd4. 12sc (12)
Rnd5. (1sc, linc) repeat 6 times (18)
Rnd6. (5sc, 1inc) repeat 3 times (21)
Rnd7. 21sc (21)
Rnd8. (5sc, 1dec) repeat 3 times (18)
Rnd9. 18sc (18)
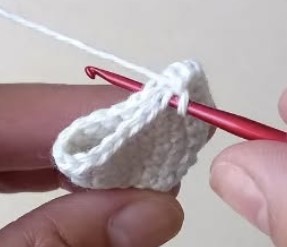
Flatten the piece and make 8sc taking the stitches on both sides at the same time to close. Leave a long thread to sew to the body.
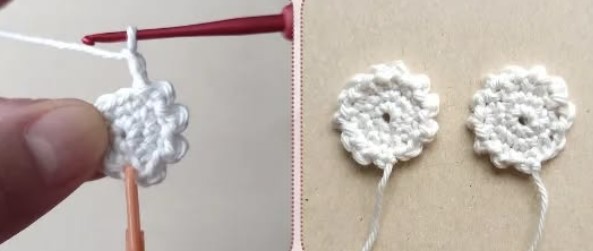
Eye circle
Make 2 in winter white:
(Do not overtighten the magic ring, as you will need to pass the safety eye through the center).
Rnd1. 6sc inside mr (6)
Rnd2. 6inc (12)
Rnd3. (ch2, 1slst) repeat 12 times (36)
Finish with a slip stitch in the first stitch of the round. Fasten off and hide the thread on the wrong side of the piece. If you wish you can leave a little thread to sew to the head.
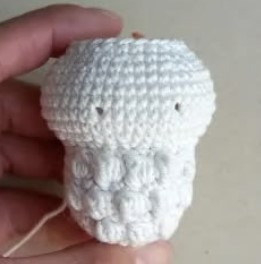
Body
In winter white:
(Remember to crochet in a circle).
Rnd1. 6sc inside mr (6)
Rnd2. 6inc (12)
Rnd3. (1sc, linc) repeat 6 times (18)
Rnd4. (2sc, linc) repeat 6 times (24)
Rnd5. (3sc, 1inc) repeat 6 times (30)
Rnd6. 30sc (30)
Rnd7. 7sc, (1boble stitch, 1sc) repeat 3 times, 17sc (30)
Rnd8. 30sc (30)
Rnd9. 6sc, (1boble stitch, 1sc) repeat 5 times, 14sc (30)
Rnd10. 30sc (30)
Rnd11. 6sc, (1boble stitch, 1sc) repeat 5 times, 14sc (30)
Rnd12. (3sc, 1dec) repeat 6 times (24)
At this moment the head begins, now you
must knit in a spiral.
Rnd13. (1sc, 1inc) repeat 12 times (36)
Rnd14. (2sc, 1inc) repeat 12 (48)
Rnd15-18. 48sc (48)
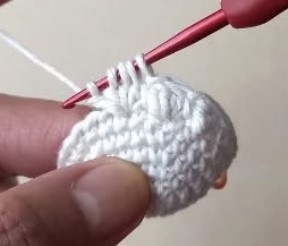
IMPORTANT: When you close the 4dc without finishing that form the boble stitch, do not make additional ch, you must continue immediately crocheting the sc indicated.
I advise you to arrange the boble stitch with your fingers from the inside out, so that they are defined. Stuff the piece.

Rnd19. (6sc, 1dec) repeat 6 times (42)
Rnd20. (5sc, 1dec) repeat 6 times (36)
Rnd21. (4sc, 1dec) repeat 6 times (30)
Rnd22. (3sc, 1dec) repeat 6 times (24)
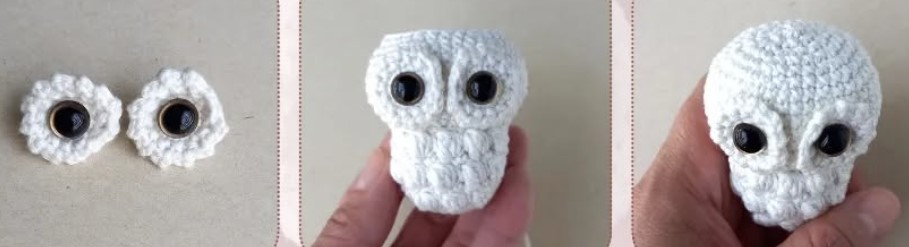
You must place the eyes between rounds 16 and 17 with 7 stitches of separation (counted from where the eye is inserted). First you must pass them through the center of the circles that you already have knitted, then place them on the head with their respective safety closure.
Finish stuff the head well.
Rnd23. (2sc, 1dec) repeat 6 times (18)
Rnd24. (1sc, 1dec) repeat 6 times (12)
Rnd25. 6dec (6)
With a tapestry needle, take the front threads of each stitch. Fasten off and hide the thread.
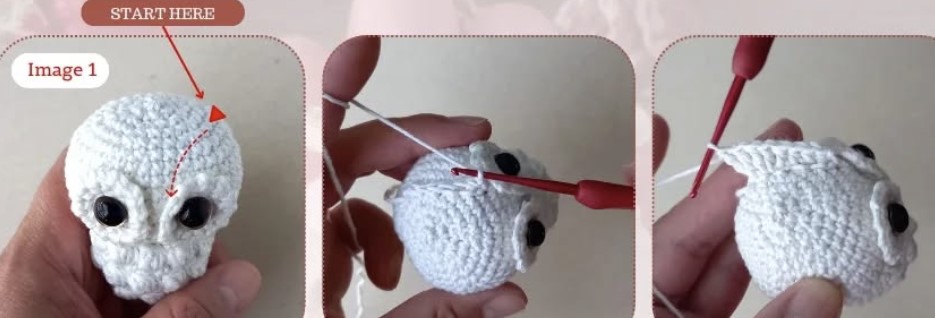
Above the eyes you will make the owl’s eyebrows. To make it easier for you and to make them centered, I recommend marking the position of each eyebrow with a pencil. Left Eyebrow: Insert your crochet into the piece (at the height of Rnd21, towards the outside) and make 7slst towards the eye Image 1, then through those same stitchs you return by crocheting the following: ch1, 1sc, 2hdc, 2dc, 2dc together, 2tr together.
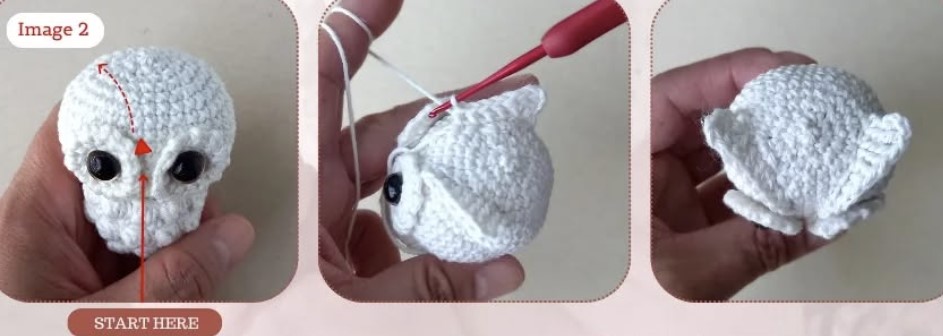
Right Eyebrow: Insert the crochet in the part closest to the eye, and make 7slst in the direction of the upper outer part of the head Image 2, then return to crocheting the following: ch4, in the same stitch 1tr, 2dc together, 2dc, 2hdc, 1sc. Fasten off.
Final assembly
You are already finishing this beautiful Owl! Now you must attach the wings to the body, define their position, use pins to leave them well located. Sew or glue them depending on your preference.

Bird beak
In mustard color:
In a magic ring, make 3hdc without finishing and close them all together. Cut and hide the thread. Glue or sew this piece to the lower center part of the eyes.
Note: I have left the circles that correspond to the eyes unsewn, this is up to your liking, you can sew or glue them, but be careful to do it after placing the beak.
Paws
Make 2 in mustard color:
Ch4, in the second from the crochet make 3sc, turn the piece, ch2, 1slst (in the same point where you made the chains), ch2, 1slst, ch2, 1slst, finally make ch1 and 1dec on the opposite part to the newly knitted row. Knot the two remaining strands. Cut and hide thread.

Sew or glue the legs, making sure they are well centered and slightly protruding.


